Pumpkin Growing Stages: A Beginner's Guide To Harvesting The Perfect Gourd
Have you ever wondered what it takes to grow the perfect pumpkin? Whether you're a seasoned gardener or just starting out, understanding pumpkin growing stages is crucial if you want to cultivate a bountiful harvest. Pumpkins aren't just for Halloween; they're versatile, nutritious, and downright fun to grow. In this article, we'll dive deep into the process, breaking down each stage and sharing tips to help you succeed.
Growing pumpkins might seem intimidating at first, but trust me, it’s not rocket science. With the right approach, even someone with a "brown thumb" can pull off an impressive pumpkin patch. So, grab your gardening gloves and a cup of coffee because we’re about to get down and dirty in the world of pumpkin cultivation.
Before we jump into the nitty-gritty details, let's set the stage: pumpkins require patience, sunlight, and a bit of TLC. If you follow the steps outlined here, you'll be well on your way to growing pumpkins that are picture-perfect. Ready to learn more? Let's go!
Read also:Why The Lidl Beauty Box Online Is Your Secret Weapon For Affordable Glamour
Why Pumpkin Growing Stages Matter
Understanding pumpkin growing stages is like having a roadmap to success. Each stage plays a critical role in the development of your pumpkins, from tiny seeds to massive gourds. By familiarizing yourself with these stages, you can anticipate challenges and ensure your plants thrive.
Imagine this: you've planted your pumpkin seeds, watered them religiously, and waited anxiously for the first sprouts to appear. But then, disaster strikes—you notice pests nibbling on the leaves or your pumpkins aren't growing as expected. Knowing the stages can help you troubleshoot issues before they spiral out of control.
Plus, learning about pumpkin growing stages gives you a deeper appreciation for the entire process. It's not just about the end result; it's about the journey and watching your plants transform over time.
Stage 1: Seed Selection and Preparation
Every great pumpkin starts with a great seed. Choosing the right seeds is the first step in your pumpkin-growing adventure. Look for seeds that are suited to your climate and the size of pumpkin you want to grow. Some varieties are perfect for carving, while others are ideal for baking or decorating.
Factors to Consider When Selecting Seeds
Here are a few things to keep in mind when picking your seeds:
- Variety: Decide whether you want a small, medium, or large pumpkin. Mini pumpkins are great for decoration, while larger ones are perfect for pies.
- Climate: Make sure the variety you choose can handle your local weather conditions. Some pumpkins thrive in hot climates, while others prefer cooler temperatures.
- Disease Resistance: Opt for seeds that are resistant to common diseases like powdery mildew. This will save you a lot of headaches down the road.
Once you've chosen your seeds, it's time to prepare them for planting. Soak them overnight in water to speed up germination, and make sure you store any leftover seeds in a cool, dry place.
Read also:What Is The Jamaican Slang For Friend Or Bro Exploring The Vibrant Language Of Jamaica
Stage 2: Planting and Germination
Now that you've got your seeds ready, it's time to get them in the ground. Planting pumpkins is relatively straightforward, but there are a few tricks to ensure success.
When to Plant
Pumpkins love warm weather, so it's best to plant them after the last frost. If you live in a colder climate, consider starting your seeds indoors a few weeks before the last frost date. This gives them a head start and increases your chances of a successful harvest.
When planting outdoors, make sure the soil temperature is at least 60°F (15°C). Pumpkins won't germinate in cold soil, so patience is key.
How to Plant
Follow these steps for optimal planting:
- Choose a sunny spot with well-drained soil.
- Create small mounds or "hills" where you'll plant your seeds. This helps with drainage and keeps the roots warm.
- Plant 2-3 seeds per hill, about 1 inch deep.
- Water the soil thoroughly after planting.
Within 7-10 days, you should start seeing tiny sprouts poking through the soil. Congrats—you're officially a pumpkin parent!
Stage 3: Seedling Growth
Once your pumpkin seedlings emerge, it's time to focus on helping them grow strong and healthy. This stage is all about providing the right conditions for your plants to thrive.
Caring for Your Seedlings
Here are some tips to ensure your seedlings grow into robust plants:
- Watering: Keep the soil consistently moist, but avoid overwatering. Too much water can lead to root rot.
- Weeding: Keep the area around your pumpkins free of weeds. Weeds compete for nutrients and can stunt the growth of your plants.
- Fertilizing: Use a balanced fertilizer to give your seedlings a nutrient boost. Be careful not to over-fertilize, as this can burn the roots.
As your seedlings grow, you may notice some of them are weaker than others. Don't be afraid to thin out the weaker plants, leaving only the strongest ones to continue growing. This ensures your pumpkins have enough space and resources to flourish.
Stage 4: Vine Development
As your pumpkin plants mature, they'll start sending out long vines. This is an exciting stage because it means your plants are getting ready to produce fruit.
Tips for Managing Vines
Vine management is crucial to prevent your pumpkin patch from becoming a tangled mess. Here's how to keep things under control:
- Pruning: Trim back excessive vines to encourage the plant to focus its energy on producing pumpkins.
- Training: Guide the vines in the direction you want them to grow. This helps prevent overcrowding and makes it easier to harvest your pumpkins later.
- Mulching: Add a layer of mulch around the base of your plants to retain moisture and suppress weeds.
Vines can spread quite far, so make sure you have enough space for them to roam. If space is limited, consider growing pumpkins vertically using trellises or supports.
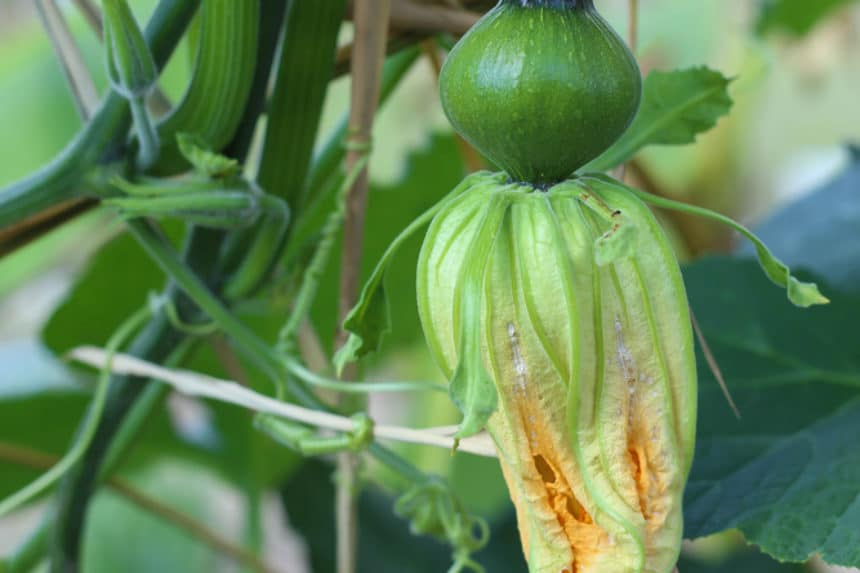
Stage 5: Flowering and Pollination
One of the most magical stages of pumpkin growing is flowering. Your plants will produce both male and female flowers, and pollination is essential for fruit development.
How Pollination Works
Pollination occurs when pollen from the male flowers is transferred to the female flowers. This can happen naturally with the help of bees and other pollinators, or you can hand-pollinate if you're feeling ambitious.
Here's how to hand-pollinate:
- Identify the male and female flowers. Male flowers have a straight stem, while female flowers have a small bump at the base.
- Use a small brush or cotton swab to collect pollen from the male flower.
- Gently transfer the pollen to the stigma of the female flower.
Successful pollination will result in tiny pumpkins forming at the base of the female flowers. Keep an eye on them as they begin to grow.
Stage 6: Fruit Development
With pollination complete, your pumpkins will start to grow rapidly. This is the stage where proper care is crucial to ensure your pumpkins reach their full potential.
Caring for Your Pumpkins
Here are some tips to help your pumpkins grow big and beautiful:
- Watering: Pumpkins need plenty of water, especially during fruit development. Aim for deep, infrequent watering to encourage deep root growth.
- Feeding: Continue fertilizing your plants, but switch to a fertilizer that's higher in potassium to promote fruit growth.
- Positioning: Gently turn your pumpkins as they grow to ensure even coloring and shape.
Be patient during this stage—pumpkins can take anywhere from 80 to 120 days to mature, depending on the variety. Don't rush the process; let nature take its course.
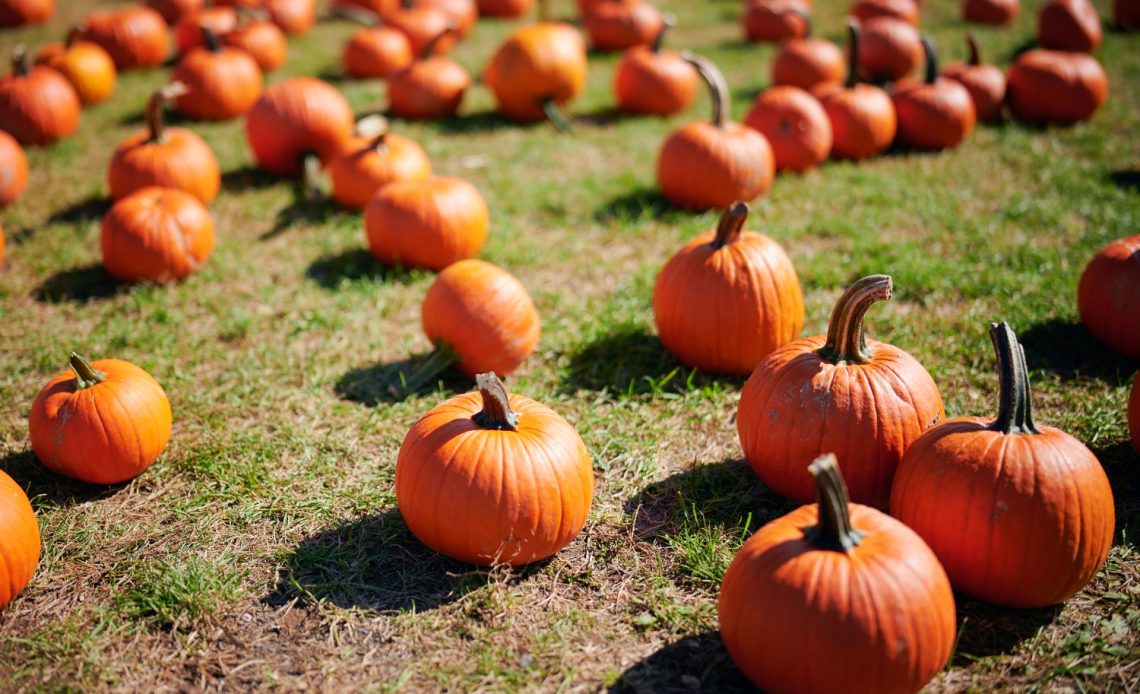
Stage 7: Harvesting
After months of hard work, it's finally time to harvest your pumpkins. Knowing when to pick them is key to ensuring they're ripe and ready to use.
Signs Your Pumpkins Are Ready
Here's how to tell if your pumpkins are ready to harvest:
- The skin should be hard and fully colored. Tap the pumpkin gently—if it sounds hollow, it's ready.
- The stem should be dry and woody. This indicates the pumpkin has reached maturity.
- Check the size. Different varieties will have different sizes, so refer to the seed packet for guidance.
When harvesting, use a sharp knife to cut the stem, leaving a few inches attached to the pumpkin. This helps prevent rot and extends the shelf life of your harvest.
Stage 8: Storage and Usage
Once you've harvested your pumpkins, it's time to decide how to use them. Whether you're planning to carve them, bake them, or simply display them, proper storage is important to keep them fresh.
How to Store Pumpkins
Here are some storage tips:
- Store pumpkins in a cool, dry place with good air circulation.
- Avoid stacking pumpkins on top of each other, as this can cause bruising.
- Check your pumpkins regularly for signs of rot or pests.
With proper storage, your pumpkins can last several months. Just remember to use them before they start to spoil.
Common Challenges and Solutions
Even the most experienced gardeners encounter challenges when growing pumpkins. Here are some common problems and how to solve them:
Pests and Diseases
Pests like squash bugs and cucumber beetles can wreak havoc on your pumpkin plants. To combat them, try these solutions:
- Row Covers: Use row covers to protect your plants from pests early in the season.
- Neem Oil: Apply neem oil to deter insects and prevent fungal diseases.
- Handpicking: Regularly inspect your plants and remove any pests you find.
Diseases like powdery mildew can also be a problem. To prevent them, make sure your plants have good air circulation and avoid overhead watering.
Conclusion: Your Pumpkin Growing Journey Awaits
Growing pumpkins is a rewarding experience that offers plenty of opportunities for learning and growth. By understanding the pumpkin growing stages, you can navigate each step with confidence and enjoy a bountiful harvest.
Remember, patience is key. Don't get discouraged if things don't go perfectly the first time. Every gardener has setbacks, but the joy of watching your pumpkins grow makes it all worth it.
Now that you've got the knowledge, it's time to take action. Share this article with your fellow gardening enthusiasts, leave a comment with your pumpkin-growing tips, or check out our other gardening guides for more inspiration. Happy planting, and may your pumpkin patch be as vibrant as your dreams!
Table of Contents
- Why Pumpkin Growing Stages Matter
- Stage 1: Seed Selection and Preparation
- Stage 2: Planting and Germination
- Stage 3: Seedling Growth
- Stage 4: Vine Development
- Stage 5: Flowering and Pollination
- Stage 6: Fruit Development
- Stage 7: Harvesting
- Stage 8: Storage and Usage
- Common Challenges and Solutions

